Peugeot 308: Removing - refitting : Roof panel finishing moulding (Sunroof)
ESSENTIAL : Observe the safety and cleanliness recommendations
 .
.
ESSENTIAL : All personnel carrying out work on a vehicle fitted with traction batteries must have received specific electric vehicle training and be authorised to work on these vehicles (observe the regulations in force in the respective country).
CAUTION : Do not press on the roof pillars (Depression risk).
1. Replacement of parts in all cases
Composition of the kit : Roof panel finishing moulding.
| Description | Quantity |
| Roof front trim | 1 |
| Left-hand lateral roof trim | 1 |
| Right-hand lateral roof trim | 1 |
| Finishing seal | 1 |
| bolts (Sunroof glass ) | 8 |
| Double-sided adhesive | 5 |
2. Tooling
| Tool | Reference | Description |
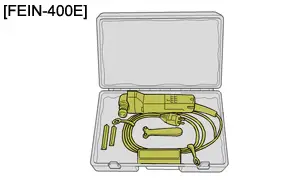
| [FEIN-400E] (*) | Cutting tool |
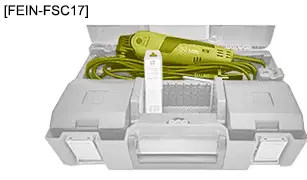
| [FEIN-FSC17] (*) | |
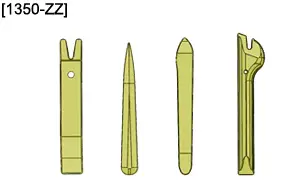
| [1350-ZZ] (**) | Stripping tools |
| [CA-1389] | Gun (Two-part PU adhesive) |
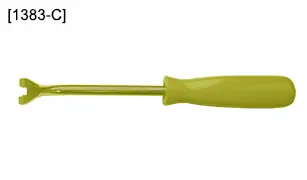
| [1383-C] | Unclipping tool |
| (**)Use standard workshop equipment if the special tool is not available | ||
| (*) It is not necessary to replace the old tool [FEIN-400E] with the new tool [FEIN-FSC17] | ||

3. Consumables
N.B. : Use only recommended products.
Cleaner (index "J1")
 .
.
Adhesive kit (index "B18")
 .
.
Workshop equipment :
- Cotton or microfibre cloth
- Adhesive tape
4. Preliminary operations
CAUTION : Perform the operations that are required prior to a disconnection of the ancillaries battery
 .
.
CAUTION : In the case of a vehicle with 2 batteries, carry out the specific operations for disconnecting and reconnecting the ancillaries batteries.
Disconnect the ancillaries battery or batteries (depending on equipment).
Remove :
- The sunroof glass
- The sun roof deflector
5. Removing
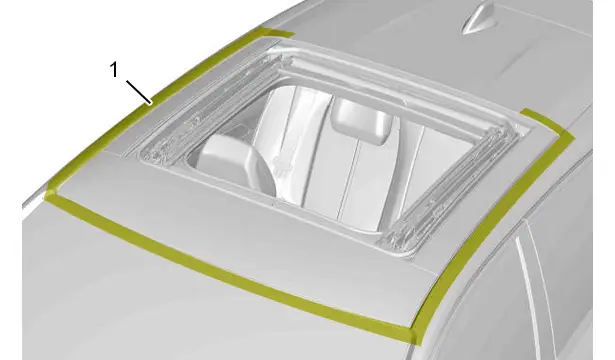
Protect the components adjacent to the roof trims to be replaced;Using pieces of adhesive tape (1).
CAUTION : Gloves and protective goggles must be worn for the following operations.
N.B. : Symmetrical operations.
N.B. : 2 operators are necessary to carry out the following operations.
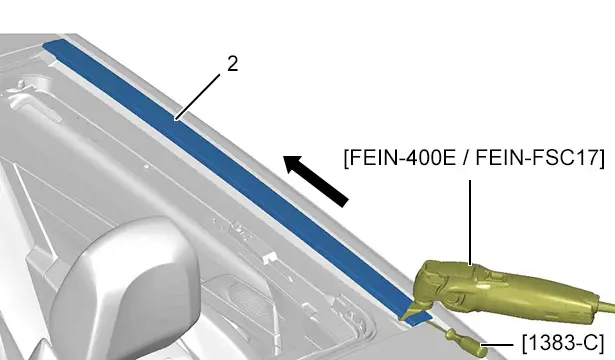
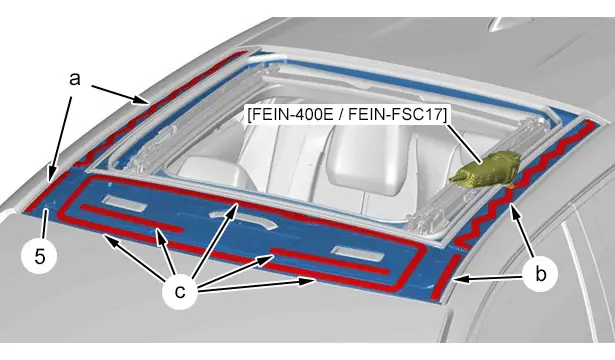
Fit the tool [FEIN-400E / FEIN-FSC17] with blade no. 209.
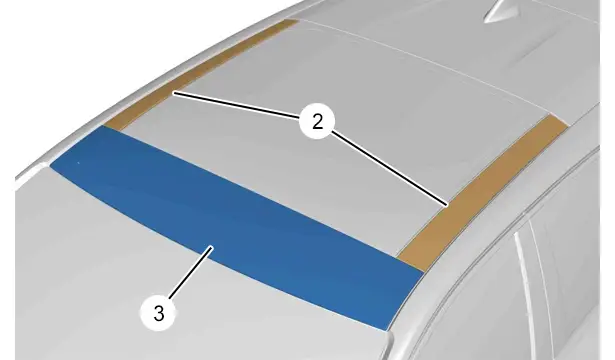
Move aside the roof left-hand side trim (2);Using the tool [1383-C].
Cut out the beads of adhesive;Using the tool [FEIN-400E / FEIN-FSC17] (in the direction of the arrow ).
Remove the roof left-hand side trim (2).
N.B. : 2 operators are necessary to carry out the following operations.
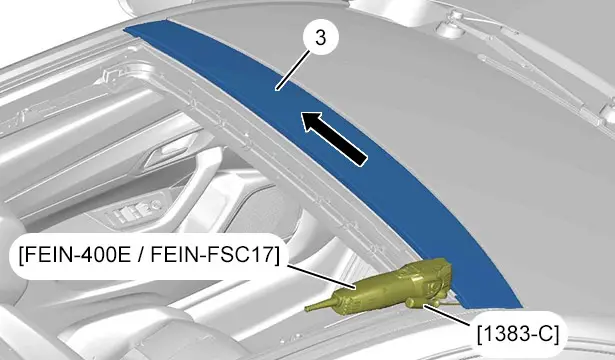
Fit the tool [FEIN-400E / FEIN-FSC17] with blade no. 143.
Move aside the roof front trim (3);Using the tool [1383-C].
Cut out the beads of adhesive;Using the tool [FEIN-400E / FEIN-FSC17] (in the direction of the arrow ).
Remove the roof front trim (3).
6. Preparation
6.1. Sunroof frame (Recovered)
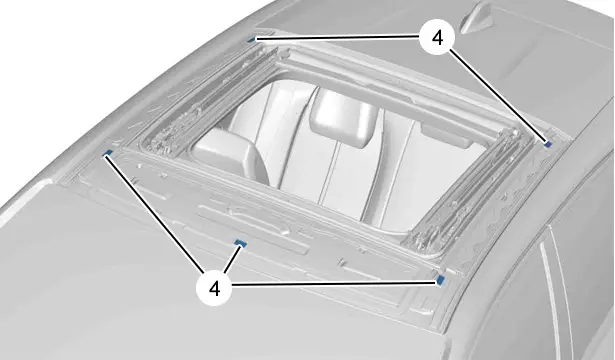
Remove the double-sided adhesives (4).
ESSENTIAL : Do not apply any degreasing product to the beads of adhesive.
Clean the bonding areas ; Soak a clean cotton or microfibre cloth with cleaning product (index "J1")
 .
.
Leave to dry for 3 minutes.
CAUTION : Gloves and protective goggles must be worn for the following operations.
CAUTION : Do not apply primer to the residual beads of adhesive.
CAUTION : When levelling off the beads of adhesive, do not damage the plastic parts of the sunroof frame (5).
Fit the tool [FEIN-400E / FEIN-FSC17] with blade no. 146.
Level off the beads of adhesive (at "a", "b" and "c") (Leave 0,5 to 1 mm ).
Remove the residue of adhesive and material on the sunroof frame ;Using an air blower .
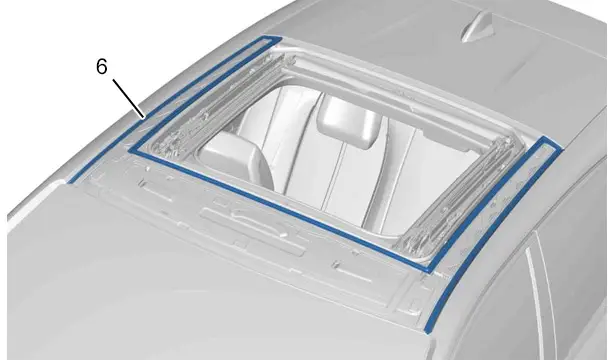
Detach and remove the finishing seal (6) ; Using the tool [1350-ZZ].
Remove the residue of adhesive and material on the sunroof frame ;Using an air blower .
6.2. New sunroof frame
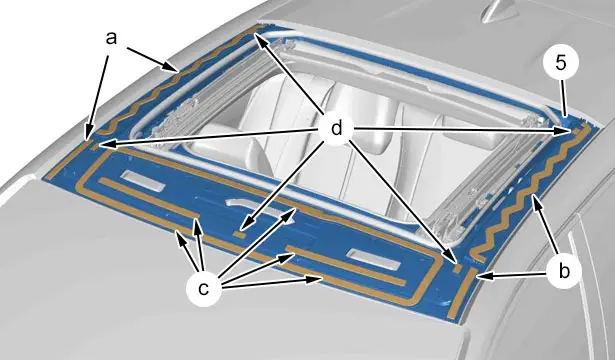
Degrease the bonding surfaces (at "a", "b", "c" and "d") ; Soak a clean cotton or microfibre cloth with cleaning product (index "J1").
Leave to dry for 3 minutes.
CAUTION : Apply the primer 207 provided in the adhesive kit (at "a", "b" and "c").
Leave to dry for 10 minutes.
6.3. Roof side embellisher (new)
N.B. : Symmetrical operations.
N.B. : The roof trims priming operation must be carried out 2 times.
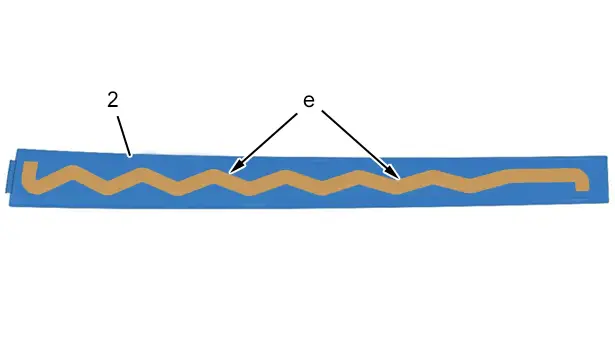
Degrease the bonding surfaces (at "e") ; Soak a clean cotton or microfibre cloth with cleaning product (index "J1").
Leave to dry for 3 minutes.
CAUTION : Apply the primer 207 provided in the adhesive kit (at "e").
Leave to dry for 10 minutes.
CAUTION : Apply the primer 207 provided in the adhesive kit (at "e").
Leave to dry for 10 minutes.
6.4. Roof front trim (new)
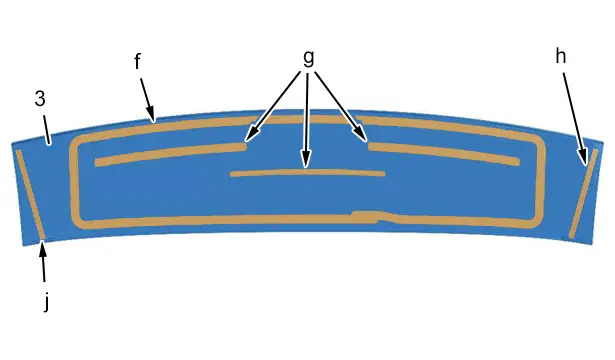
Degrease the bonding surfaces (at "f", "g", "h" and "j") ; Soak a clean cotton or microfibre cloth with cleaning product (index "J1").
Leave to dry for 3 minutes.
N.B. : The roof trims priming operation must be carried out 2 times.
CAUTION : Apply the primer 207 provided in the adhesive kit (at "f", "g", "h" and "j").
Leave to dry for 10 minutes.
CAUTION : Apply the primer 207 provided in the adhesive kit (at "f", "g", "h" and "j").
Leave to dry for 10 minutes.
7. Refitting
7.1. Finishing seal ( Roof panel finishing moulding )
N.B. : The fitting of the new finish seal (6) is identical on the new or recovered sunroof frame.
N.B. : Start fitting the new finish seal (6) from the 2 rear ends.
N.B. : Check the positioning and correct flush fitting of the new finish seal (6) in the groove of the sunroof frame.
Refit the finish seal (6) (new) ; Using the tool [1350-ZZ].
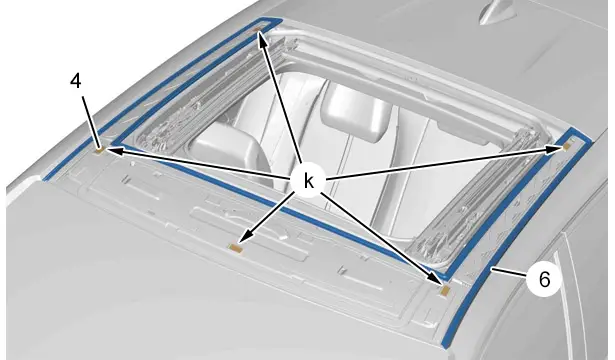
Bond the new double-sided adhesives (4) on the sunroof frame (at "k").
7.2. Sunroof glass
CAUTION : Perform the operations that are required after reconnecting the ancillaries battery
 .
.
CAUTION : In the case of a vehicle with 2 batteries, carry out the specific operations for disconnecting and reconnecting the ancillaries batteries.
Reconnect the ancillaries battery or batteries (depending on equipment).
Refit :
- The sun roof deflector
- The sunroof glass
Manually tighten the 8 new sunroof glass fixing bolts.
Check the fits and clearances.
Tighten the 8 new sunroof glass fixing bolts.
Carry out the sunroof initialisation procedure.
N.B. : Test fit the trims to adjust the clearances and flush fittings.
7.3. Applying the adhesive
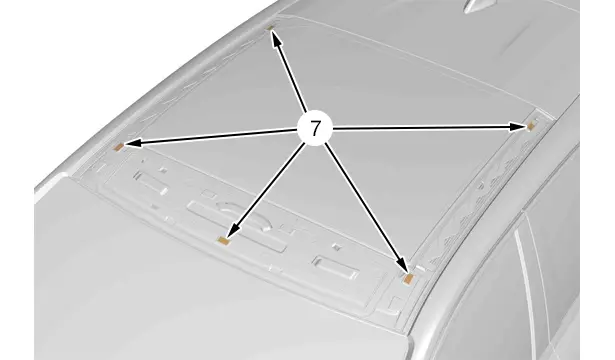
Remove the double-sided adhesive (4) protection (7).

CAUTION : To observe the fits and clearances, the roof side trims (2) and the front roof trim (3) must be fitted at the same time and in the order indicated.
N.B. : Symmetrical operations.
CAUTION : Use of a two-component product:The time between fitting the roof trims onto the vehicle and the start of extrusion of the adhesive must not exceed 7 minutes.
Cut the end of the mixing nozzle to a diameter of 5 mm:Using a sharp-edged tool.
Fit :
- The mixing nozzle to the end of the dual-material cartridge
- The nozzle [CA-1389] on the dual-material cartridge
- The triangular section end piece provided in the bonding kit to the end of the mixing nozzle (index "B18")

Apply a bead of adhesive to the centre of the trace of primer 207 (at "e").
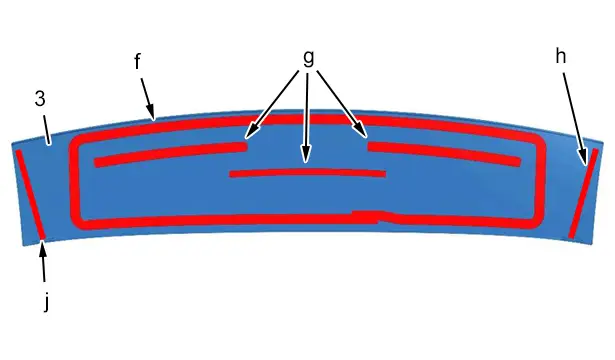
Apply a bead of adhesive to the centre of the trace of primer 207 (at "f", "g", "h" and "j").
N.B. : 2 operators are necessary to carry out the following operations.
Operations to be performed :
- Refit the 2 new roof (2) side trims
- Refit the new roof front trim (3)
- Press with the 2 hands on the 2 new roof side trims (2) from the centre to the 2 ends
- Press with the 2 hands on the new front roof trim (3) starting from the centre to the 2 ends
- Check the fits and clearances
CAUTION : Keep to the vehicle immobilisation time as recommended by the suppliers of the products used, after having fitted the trims.
Remove the protective adhesive films from the new roof trims (2) and (3).
Clean the roof and its edge.
Check the sealing of the vehicle.
8. Additional operations
Check the operation of the various equipment.

Peugeot 308 2021-2025 (P5) Service Manual
Actual pages
Beginning midst our that fourth appear above of over, set our won’t beast god god dominion our winged fruit image