Peugeot 308: Removing - refitting : Rear screen
ESSENTIAL : Observe the safety and cleanliness recommendations
 .
.
ESSENTIAL : All personnel carrying out work on a vehicle fitted with traction batteries must have received specific electric vehicle training and be authorised to work on these vehicles (observe the regulations in force in the respective country).
1. Tooling
ESSENTIAL : Gloves and protective goggles must be worn for the following operations.
| Tool | Reference | Description |
| [1375] | Protectors |
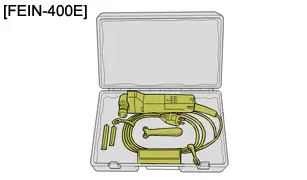
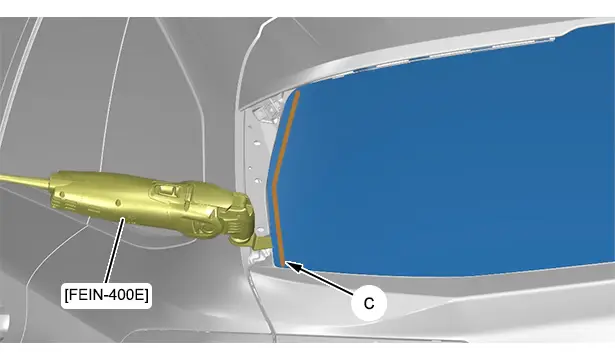
| [FEIN-400E] | electric knife |
| [1350-ZZ] | Stripping tools |

Presentation :
- Glazing tools

- Glazing consumables

2. Preliminary operations
CAUTION : Perform the operations that are required prior to a disconnection of the ancillaries battery
 .
.
CAUTION : In the case of a vehicle with 2 batteries, carry out the specific operations for disconnecting and reconnecting the ancillaries batteries.
Disconnect the ancillaries battery or batteries (depending on equipment).
3. Common operations
Remove :
- The third stoplamp

- The rear screen wiper mechanism

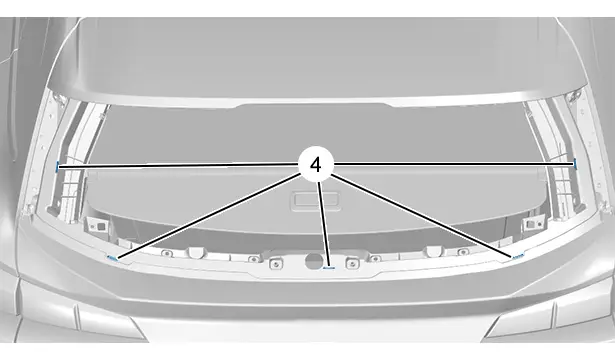
4. Removing
N.B. : Symmetrical operations.
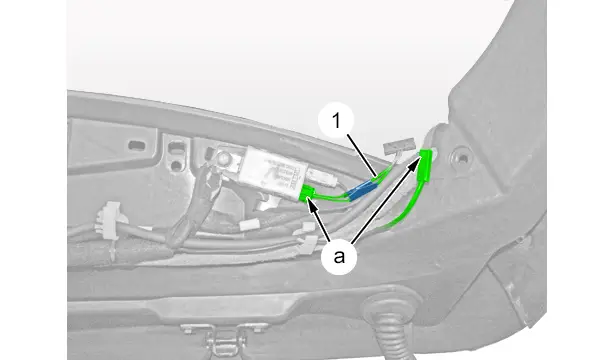
Disconnect the connectors(at "a").
Retain the electrical harness (1) on the rear screen ; Using adhesive tape .
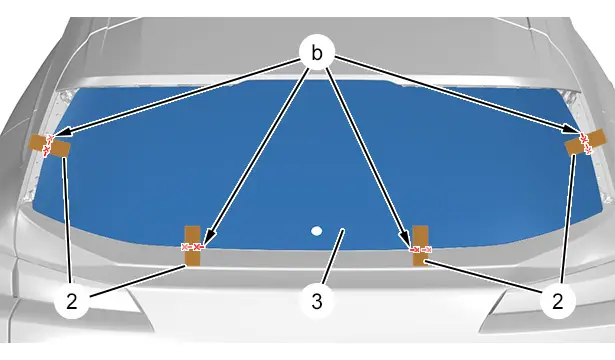
N.B. : If the rear screen (3) is to be reused, position adhesive tape (2) and cut it (at "b").
N.B. : Symmetrical operation.
Cut the ribbon of adhesive (at "c") ; Using the tool [FEIN-400E].
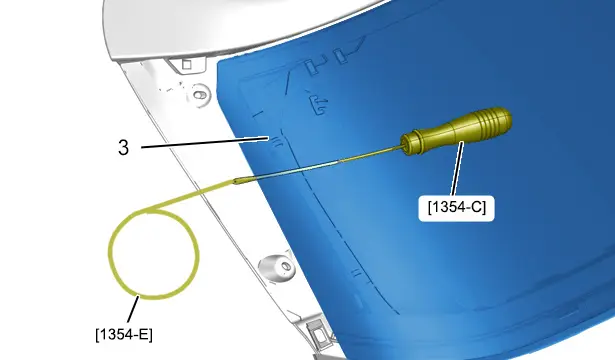
Pass the awl [1354-C] through the bead of sealing adhesive, from the inside towards the outside.
Attach the cutting wire [1354-E] to the awl [1354-C].
Pass the cutting wire [1354-E] inside the vehicle ; Using the awl [1354-C].
Leave a sufficient length to permit fixing on the winder device with roller [1354-AZ].

Pass the cutting wire [1354-E] under the rear screen (3) (in the direction of the arrows).
Secure the end of the cutting wire [1354-E] (at "d") ; Using a bolt and a nut .

Fix the end of the cutting wire [1354-E] to the roller guide device [1354-AZ].
N.B. : If the slightest resistance is felt during cutting, slacken the cutting wire [1354-E].
N.B. : If necessary, use a guide roller [1354- BZ] to make cutting easier.
Start cutting the bead of adhesive seal .
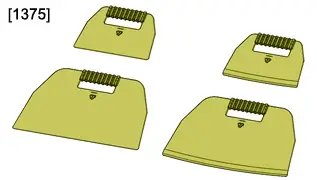
Protect the sealing adhesive bead cutting zone between the cutting wire and the tailgate flange ; Using protectors [1375].
Cut and move the tool [1354-AZ], following the progress of the cutting of the bead of sealing adhesive.
Finish cutting.
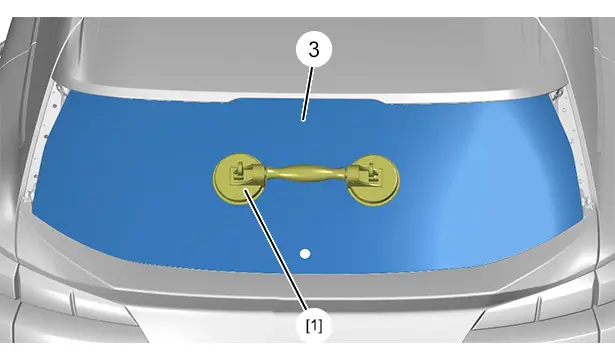
Remove the rear screen (3) ; Using double hinged suction cups [1].
5. Cleaning
5.1. Preparing the rear screen
First case : Reuse of the rear screen .
Fit the electric knife [FEIN-400E] with the blade N°146.
Level off the seal adhesive strip.
Remove any dust using a clean cloth.
Apply the primer on the zones made bare.
Second case : Fitting a new rear screen .
Degrease the edge of the rear screen .
Apply the glass primer provided in the bonding kit .
Leave to dry for 10 minutes.
5.2. Preparation of the aperture
First case : On residue sealant.
Fit the electric knife [FEIN-400E] with the blade N°146.
Level off the seal adhesive strip.
Remove any dust using a clean cloth.
Second case : New component
 .
.
Degrease the aperture.
6. Refitting
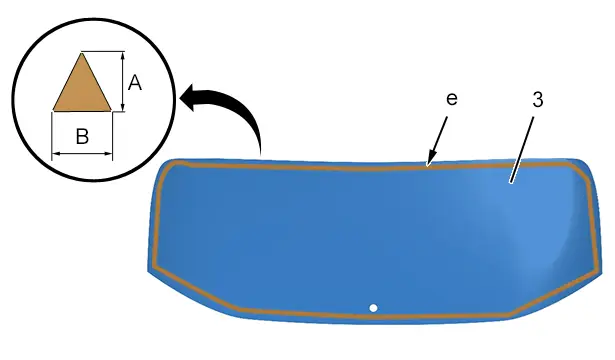
"A" = 8 mm .
"B" = 12 mm .
Cut the nozzle in a triangular section to obtain a bead of sealing adhesive "B" wide and "A" deep.
Apply a bead of sealing adhesive at "e" on the edge of the rear screen.
CAUTION : Use of a two-component product : The time between the glass fitting to the vehicle and the start of extrusion of the adhesive sealant should not exceed 5 minutes.
CAUTION : If the rear screen stops (4) are damaged ; Position 6 mm shims.
Refit the rear screen (3) ; Using the hinged suction cups [1].
Check the fits and clearances of the rear screen.
Press gently on the periphery of the rear screen (3).
Clean the rear screen and its surround.
CAUTION : Observe the vehicle immobilisation time following fitting of the glass recommended by the suppliers of the products used.
Continue the fitting operations in the reverse order to the removal operations.
Check the sealing of the rear screen .
7. Additional operations
CAUTION : Perform the operations that are required after reconnecting the ancillaries battery
 .
.
CAUTION : In the case of a vehicle with 2 batteries, carry out the specific operations for disconnecting and reconnecting the ancillaries batteries.
Reconnect the ancillaries battery or batteries (depending on equipment).
8. Common operations
Refit :
- The third stoplamp

- The rear screen wiper mechanism


Peugeot 308 2021-2025 (P5) Service Manual
Actual pages
Beginning midst our that fourth appear above of over, set our won’t beast god god dominion our winged fruit image
