Peugeot 308: Repair : Impact on laminated windows
ESSENTIAL : Observe the safety and cleanliness recommendations
 .
.
1. Tooling
N.B. : Refer to the tools catalogue.
Equipment :
- Protective gloves
- Protective goggles
- Protective mask
- 1Repair kit (Manual injection )
- 1Repair kit (Injection using the pressure/vacuum pump )
2. Windscreen repair area
CAUTION : Read the repair manual in full.
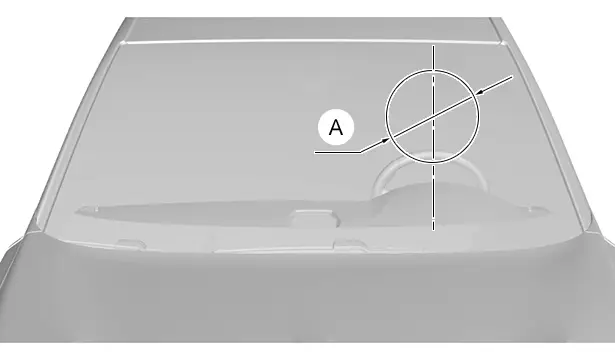
"A" = 300 mm.
ESSENTIAL : The repair of the windscreen within the driver’s field of vision is prohibited (Following the dimension "A" ).
N.B. : Regardless of the location on the windscreen, the repair is not recommended when the crack extends to the edges of the windscreen.
ESSENTIAL : If the impact is more than 50 mm : Replace the windscreen.
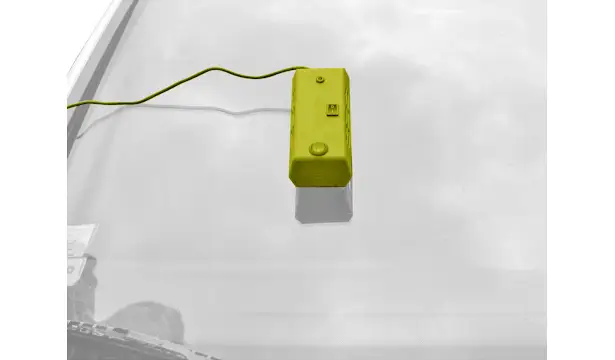
3. Windscreen is fitted with a rain and brightness sensor and/or a multifunction video camera
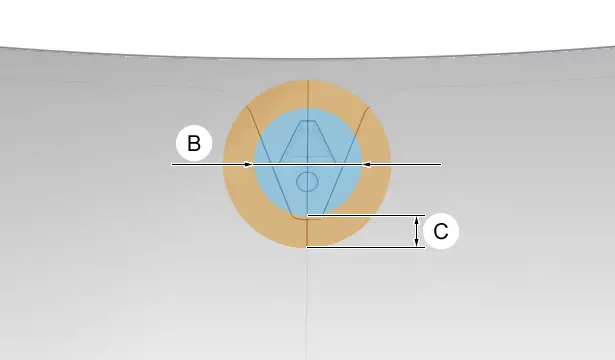
"B" = 200 mm.
"C" = 20 mm.
The repair must not be completed :
- In the area where the rain and brightness sensor and/or the multifunction video camera is fitted (Following the dimension "B" )
- In the circular area around zone "B" according to dimension "C"
4. Types of impact
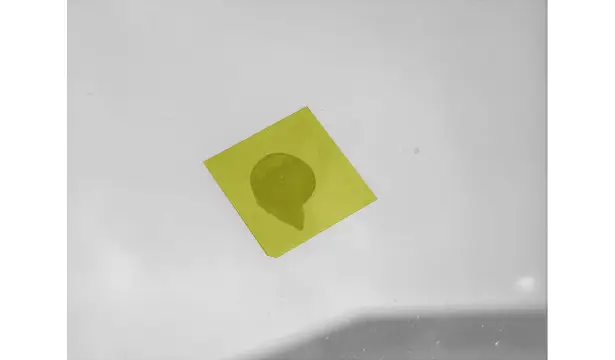
4.1. Bubble or half-bubble impacts
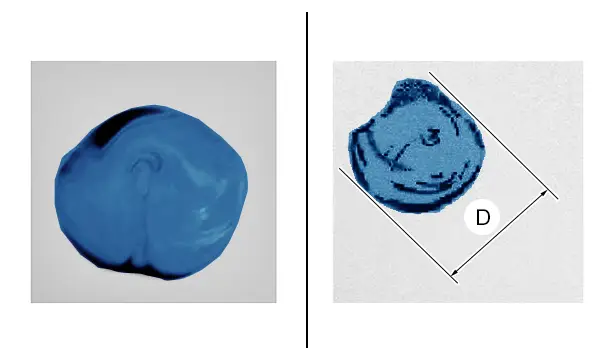
"D" = 20 mm (Maximum ).
N.B. : Formation of a cone following a small hole at the point of impact.
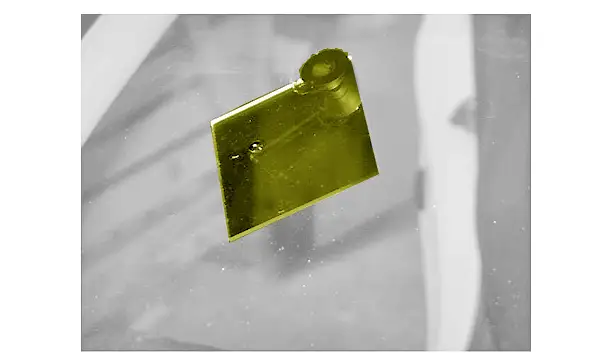
4.2. Star impact
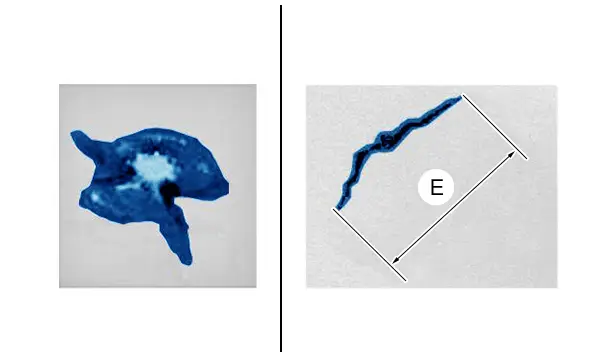
"E" = 50 mm (Maximum ).
N.B. : Formation of cracks or worse, spreading from the point of impact.
4.3. Star bubble or combination impact
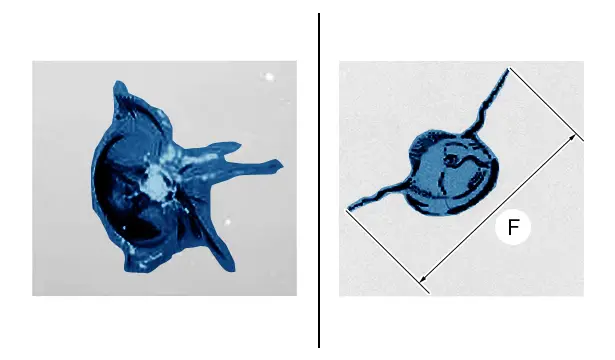
"F" = 50 mm (Maximum ).
N.B. : Formation of cracks or worse, spreading from the point of impact.
5. Precautions regarding use
N.B. : Numerous factors can affect the result of a repair.
The most important points to be complied with are the following :
- Check for the presence of moisture in the impact
- Check that the temperature of the window is between 10°C and 30°C
- Protect the resin from ultraviolet rays
- Control the injection of the product
5.1. Moisture
N.B. : If moisture is present, dry out the impact ; Using the heating lamp supplied in the repair kit.
CAUTION : Heat the laminated window moderately using the heating lamp, as any excessively strong and/or intense heat source may enlarge the impact and crack the laminated window.
5.2. Temperature
The ideal temperature for repairing a laminated window is between 10 and 30°C.
5.3. Ultraviolet rays
Repair away from ultraviolet rays.
5.4. Injection of the product
Follow the product injection recommendations specified in the repair manual.
6. Repair
N.B. : Proceed in the same way for an athermic windscreen.
Clean the laminated window around the impact using a dry, lint-free cloth.
N.B. : Do not spray any products onto the impact.
6.1. Fitting
Moisten the suction cup to allow correct adhesion to the inside of the window.
Secure the mirror inside the passenger compartment at the impact ; Using a suction cap.
N.B. : The mirror is used as a guide throughout the repair procedure.

Drill out the point of impact until contact is made with the sheet of polyvinyl butyral ; Using the drill and the drill bit .
6.2. Injection process
2Processes for injecting the resin :
- 1Manual process
- 1Process using a pressure/vacuum pump
N.B. : Refer to the repair manual : Before removing the injection syringe, check that there is no air in the impact.
6.3. Drying and finishing

Apply a drop of finishing resin.
Apply a plastic sheet over the finishing resin.
N.B. : Do not touch the finishing resin with your fingers.
Allow the plastic sheet to rest naturally, the finishing resin must cover the entire impact.
Position the ultraviolet lamp over the plastic sheet.
Leave to dry for at least 15 minutes.
Remove :
- The ultraviolet lamp
- The plastic sheet
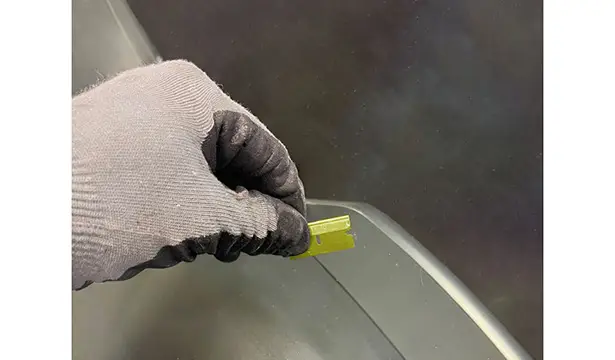
CAUTION : Scrape off the excess finishing resin until flush with the laminated window.
Scrape off the excess finishing resin ; Using the scraper.
Apply the special glass finishing polish using a lint-free cloth.
Clean the laminated window.
Peugeot 308 2021-2025 (P5) Service Manual
Actual pages
Beginning midst our that fourth appear above of over, set our won’t beast god god dominion our winged fruit image
