Peugeot 308: Removing - refitting : Driveshafts
ESSENTIAL : Observe the safety and cleanliness recommendations
 .
.
ESSENTIAL : All personnel carrying out work on a vehicle fitted with traction batteries must have received specific electric vehicle training and be authorised to work on these vehicles(observe the regulations in force in the respective country).
1. Parts which must always be replaced
| Description | Quantity |
| Gearbox drain cap seal (Reduction gear ) | 1 |
| Driveshaft nut (Self-locking nut only) | 1 (Per side) |
| Bolt (Driveshaft bearing) | 1 |
| Steering ball joint nut | 1 (Per side) |
| Bolt-nut assembly ( hub carrier lower ball joint) | 1 (Per side) |
| Anti-roll bar rod nut | 1 (Per side) |
| Lip seal (Reduction gear ) | 1 (Per side) |
2. Tooling
| Tool | Reference | Description |
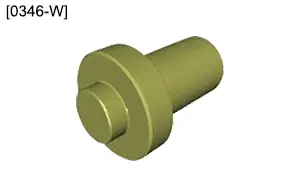
| [0346-W] | Fitting drift for the final drive output lip seal(left-hand side) |
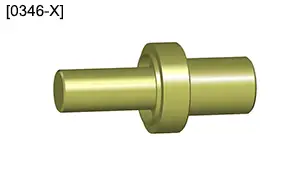
| [0346-X] | Fitting drift for the final drive output lip seal(right-hand side) |
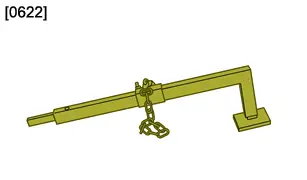
| [0622] | Hub carrier ball joint uncoupling lever |
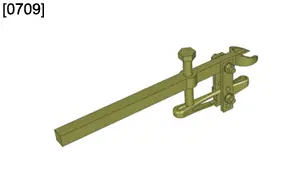
| [0709] | Ball joint extractor |
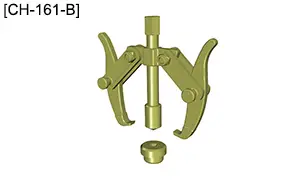
| [CH-161-B] | |
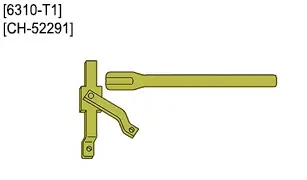
| [6310-T1] | Hub immobilising tool |
| [CH-52291] |
3. Removing
Lift and support the vehicle with the wheels hanging free.
Remove the under-engine protector.
Drain the reduction gear
 .
.
Refit the drain cap fitted with a new seal.
3.1. Left and right hand drive shafts
Remove :
- The front wheels
- The driveshaft pin and cage
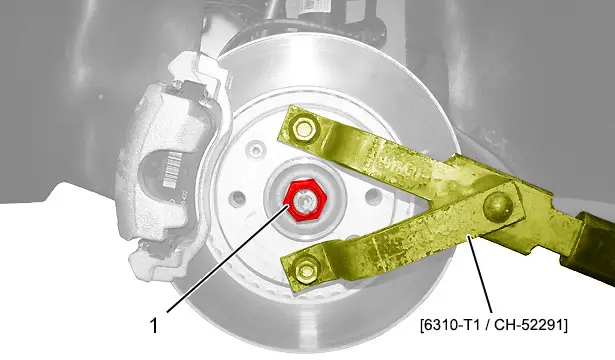
CAUTION : Do not use a pneumatic gun during the driveshaft nut (1) removal and refitting operations (Damage to the driveshaft thread).
Fit the tool [6310-T1 / CH-52291].
Remove :
- The driveshaft nut (1)
- The tool [6310-T1 / CH-52291]
CAUTION : Never brake to loosen the driveshaft nut because this is likely to shear the bolts fastening the brake disc.
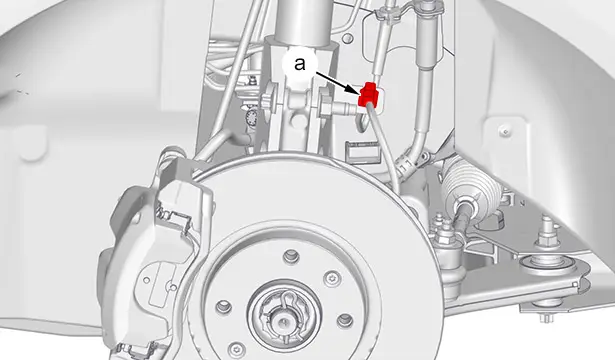
Release the electrical harness (at "a").
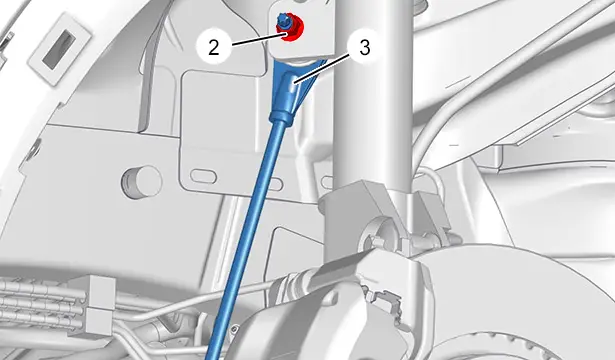
Remove the nut (2).
Move aside the rod (3) of the anti-roll bar .
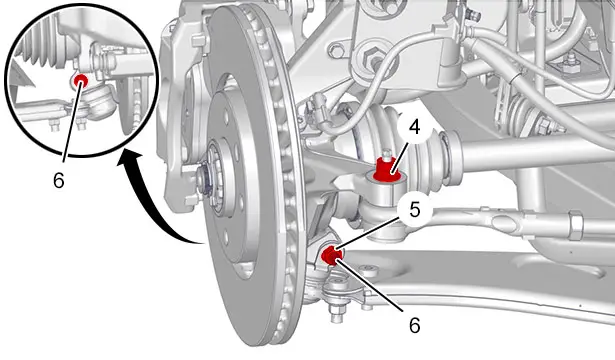
Remove the nut (4).
Uncouple the steering ball-joint ; Using the tool [0709].
Remove :
- Nut (5)
- The bolt (6)
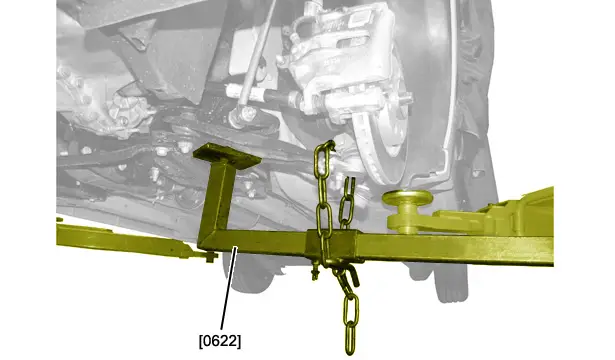
CAUTION : Set the hub carrier ball joint protector aside.
Uncouple the pivot ball-joint ; Using the tool [0622].
3.2. Left-hand driveshaft
CAUTION : Do not twist the brake hose .
N.B. : In order not to damage the left-hand driveshaft gaiter, disengage the pivot and swivel the shock absorber body by a quarter turn.
Disengage the LH driveshaft from the wheel hub.
Remove the left-hand driveshaft.
3.3. Right-hand driveshaft
CAUTION : Do not twist the brake hose .
N.B. : In order not to damage the right-hand driveshaft gaiter, disengage the pivot and swivel the shock absorber body by a quarter turn.
Disengage the RH driveshaft from the wheel hub.
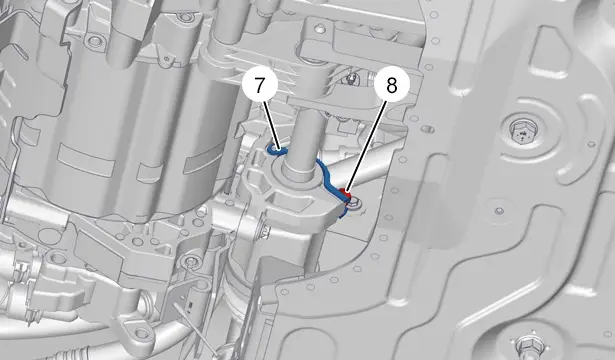
Remove the bolt (8).
Remove the clip from the bearing housing (7).
Remove the right-hand driveshaft.
4. Checking
Check :
- The absence of play in the driveshaft joints
- The condition of the gaiters
- The condition of the driveshaft support bearing
Repair the driveshafts(if necessary).
5. Refitting
CAUTION : Observe the tightening torques.
ELECTRIC DRIVE TRAIN
Tightening torques :
- Driveshafts

- Wheels

- Front suspension

- Steering

5.1. Left-hand driveshaft seal
CAUTION : Do not lubricate the seals .
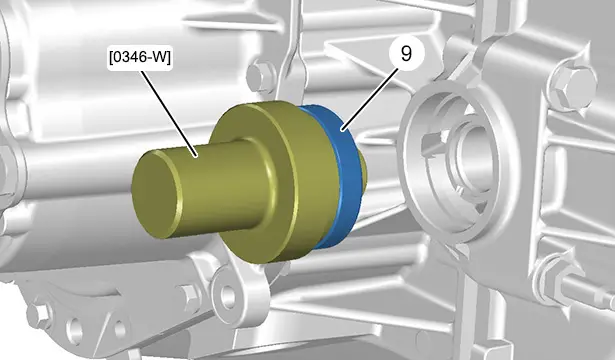
Refit the left hand transmission seal (9) ; Using tool [0346-W] and a mallet.
5.2. Right-hand driveshaft seal with driveshaft bearing
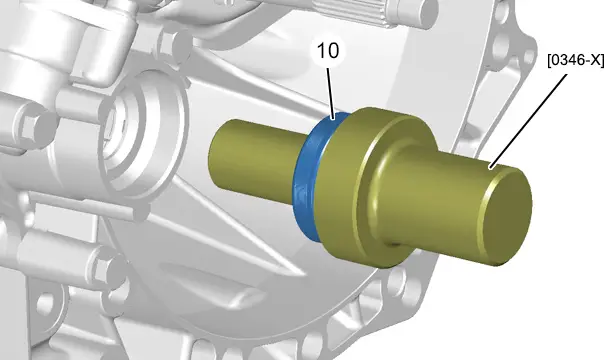
Refit the right hand transmission seal (10) ; Using tool [0346-X] and a mallet.
5.3. Left-hand driveshaft
Engage :
- The driveshaft in the differential
- The driveshaft splines in the wheel hub
5.4. Right-hand driveshaft
Engage the driveshaft in the differential.
Refit :
- The clip in the bearing housing (7)
- The new bolt (8)
Insert the driveshaft splines in the wheel hub.
5.5. Left and right hand drive shafts
CAUTION : Refit the hub carrier ball joint protector.
Couple the pivot lower ball-joint ; Using the tool [0622].
Refit :
- The new bolt (6)
- The new nut (5)
Couple up the steering ball-joint.
Refit :
- The new nut (4)
- The anti-roll bar rod (3)
- The new nut (2)
- The new driveshaft nut (1) ; Using the tool [6310-T1 / CH-52291]
Remove the tool [6310-T1 / CH-52291].
Peen the driveshaft nut (1) (According to equipment).
Refit the drive shaft pin and cage (According to equipment).
Clip the electrical harness (at "a").
Fill the reduction gear with oil and top up the level
 .
.
Refit :
- The front wheels
- The under-engine protector
- The vehicle to its wheels

Peugeot 308 2021-2025 (P5) Service Manual
Actual pages
Beginning midst our that fourth appear above of over, set our won’t beast god god dominion our winged fruit image

