Peugeot 308: Replacement : Driveshaft gaiters
ESSENTIAL : Observe the safety and cleanliness recommendations
 .
.
N.B. : Use the products recommended by the manufacturer
 .
.
ESSENTIAL : All personnel carrying out work on a vehicle fitted with traction batteries must have received specific electric vehicle training and be authorised to work on these vehicles (observe the regulations in force in the respective country).
ESSENTIAL : All personnel working on vehicles with a fuel cell stack must have completed the STELLANTIS training courses required to work on these vehicles (observe the regulations in force in the respective country).
1. Replacement of parts in all cases
| Description | Quantity |
| Driveshaft gaiter (Wheel side) | 1 |
| Gaiter tightening clamp (Wheel side) | 2 |
| Driveshaft gaiter (Gearbox end ) | 1 |
| Gaiter tightening clamp (Gearbox end ) | 2 |
| Circlip | 1 |
| Stop ring | 1 |
2. Tooling
| Tool | Reference | Description |
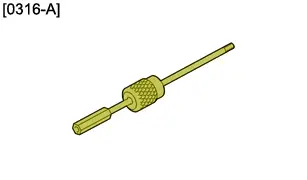
| [0316-A] | Slide hammer |
| [0410-ZY][4101-TBIS] | Driveshaft repair kit |
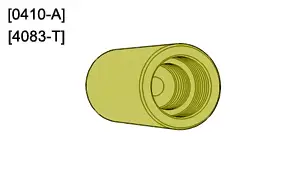
| [0410-A][4083-T] | Stub axle removal threaded sleeve | |
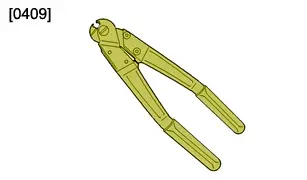
| [0409] (*) | Pliers for fitting driveshaft gaiter clips |
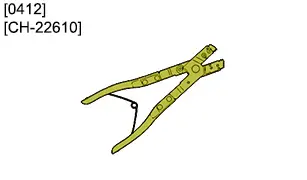
| [0412][CH-22610] | hose clip pliers |
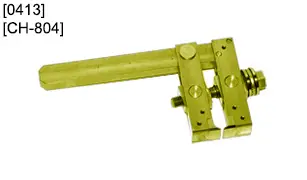
| [0413][CH-804] | pliers for wing clips |
| (*) Use standard workshop equipment if the special tool is not available | ||
3. Identification
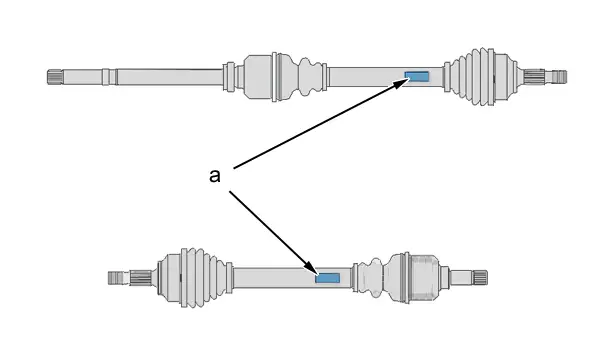
The driveshafts are identified by a label affixed to the shaft (at "a"), indicating the supplier reference.
List of suppliers :
- GKN
- PSA
- NTN
4. Preliminary operations
N.B. : The ABS crowns are discontinued (the function fulfilled by the crowns is transferred to the front wheel bearings).
Remove the driveshafts.
Support the driveshaft in a vice fitted with soft jaws.
CAUTION : Before removal : Mark the positions of the driveshaft gaiters.
5. Replacement : Gaiter on the wheel side
CAUTION : Always replace the clips and circlips that have been removed.
5.1. PSA and NTN driveshafts
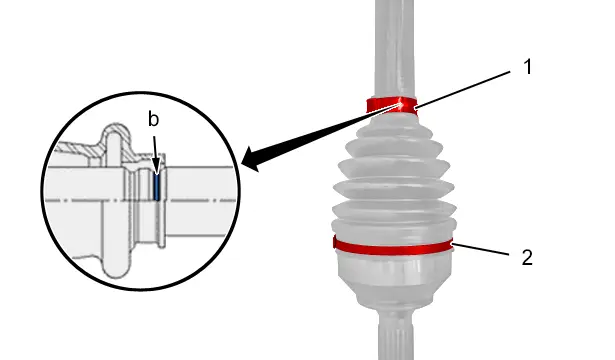
Remove the clips (1) and (2) ; Using a hacksaw.
CAUTION : Mark the position of the driveshafts gaiter not possessing any positioning grooves at ("b").
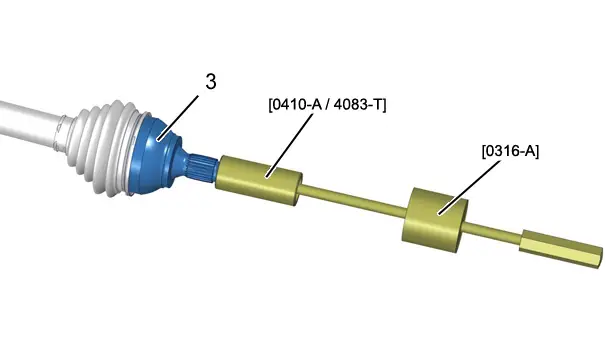
Remove the housing (3) ; Using the tools [0316-A], [0410-A / 4083-T].
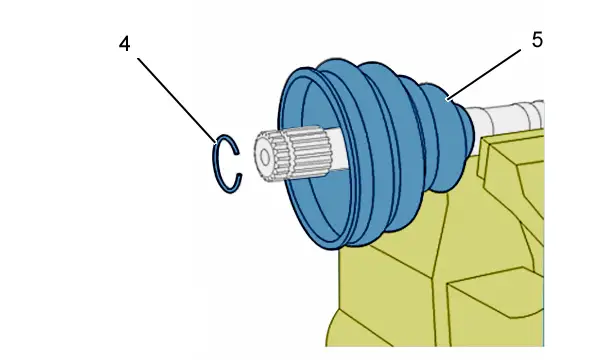
Remove :
- The stop ring (4)
- The driveshaft gaiter (5)
Refit :
- The new driveshaft gaiter (5)
- The new stop ring (4)
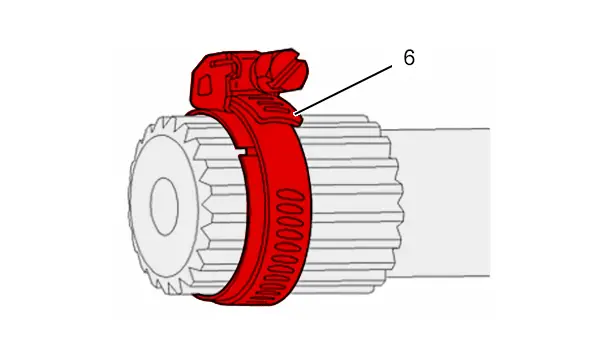
Fit a clip (6) on the stop ring to facilitate force-fitting of the housing (3).
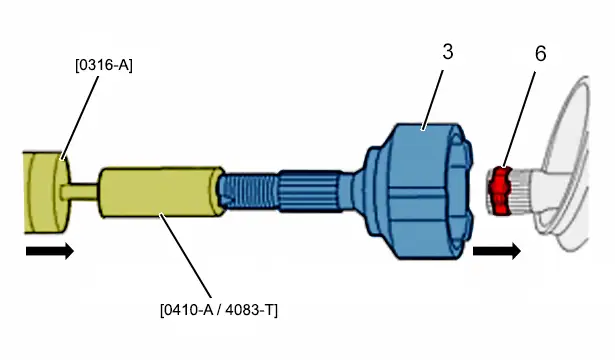
Refit the housing (3) to the shaft ; Using the tools [0316-A], [0410-A / 4083-T].
Remove the clamp (6).
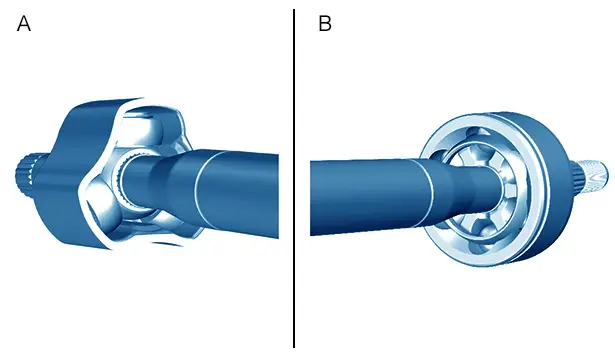
Assembly "A" : Constant velocity joint RZEPPA.
Assembly "B" : Constant velocity joint JB3 / JB4.
N.B. : If no grease is available in the repair kit, use grease index "G13"
 .
.
Fill the gaiter with all the grease available in the repair kit.
Assemble the driveshaft gaiter (5) and the housing (3).
CAUTION : Pay attention to the location of the gaiter on the shaft: gaiter lip in the groove "b" of the shaft or on the mark made when removing.
Refit and tighten the clips (1) and (2).
5.2. GKN driveshaft
N.B. : The driveshaft bowl on the wheel side cannot be removed ; The replacement of a driveshaft gaiter on the wheel side necessitates the removal of the gearbox side gaiter.
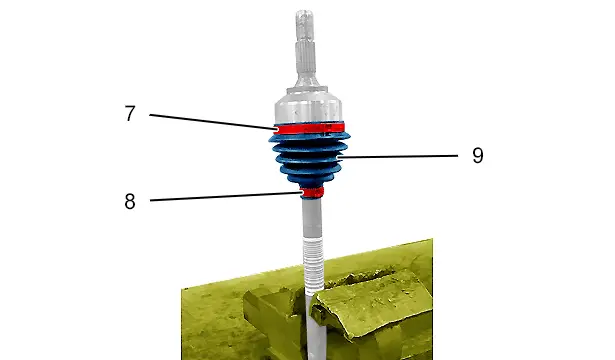
Remove :
- The driveshaft gaiter (on the gearbox side)
- The clips (7), (8)
- The driveshaft gaiter (9)
Fit the new driveshaft gaiter (9) on the driveshaft.
Fill the gaiter with all the grease available in the repair kit.
Refit :
- The clips (7) and (8)
- The driveshaft gaiter (on the gearbox side)
6. Replacement : Gaiter on the gearbox side
6.1. GKN and NTN driveshafts
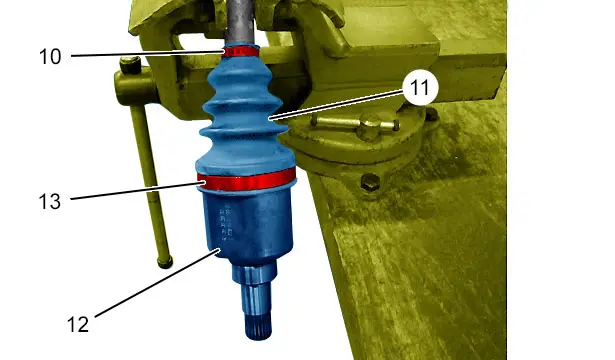
Remove the clips (10), (13).
Move aside the driveshaft (11) gaiter .
Remove vertically the spider housing (12).
Remove as much grease as possible from inside the driveshaft gaiter .
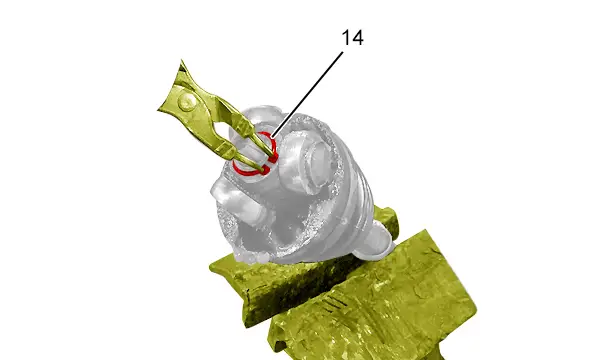
Clean off the excess grease in the driveshaft gaiter (11) and on the spider .
Remove the circlip (14).
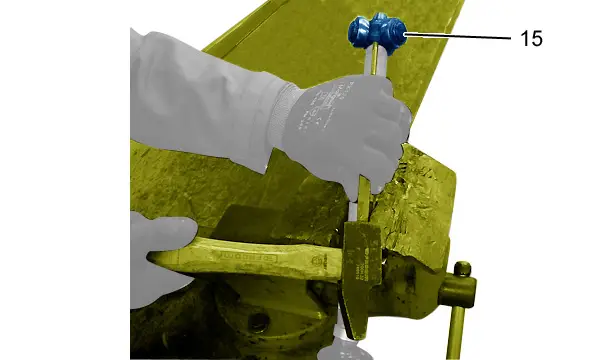
Remove :
- The spider (15) ; Using a hammer and a pin punch
- The driveshaft gaiter (11)
Refit :
- The new driveshaft gaiter (11) on the driveshaft
- The spider (15)
- The new circlip (14)
Fill the gaiter with all the grease available in the repair kit.
Refit :
- The spider housing (12)
- The new clips (10), (13)
6.2. PSA driveshaft
N.B. : On the gearbox side, as the spider cannot be removed, replacement of the gaiter is only possible following removal of the seal on the wheel side.
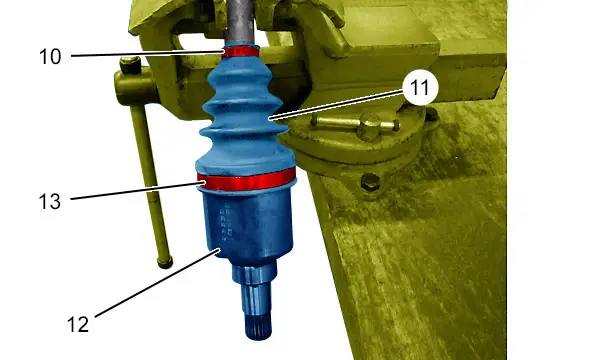
Remove :
- The driveshaft gaiter (11) (wheel side)
- The clips (10), (13)
- The spider housing (12)
- The driveshaft gaiter (11)
Remove as much grease as possible from the driveshaft seal; do not use a solvent.
Fit the new driveshaft gaiter (11) on the driveshaft.
Distribute 130 gr of grease between the gaiter and the spider.
Refit :
- The spider housing (12)
- The clips (10), (13) (new)
- The driveshaft gaiter (11) (wheel side)
7. Tightening clamps
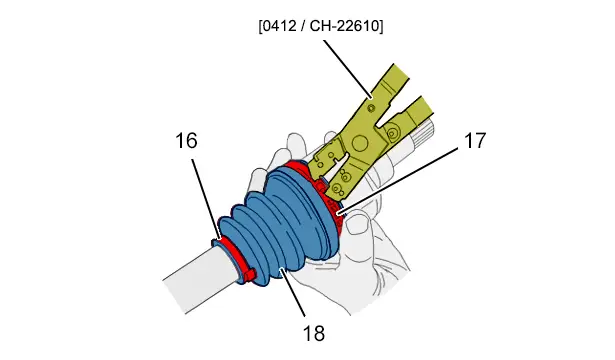
Refit :
- The new driveshaft gaiter (18) (Observe the marks made during the dismantling operation)
- The clips (16), (17) (new) ; Using the special tool (According to the clips)
- The clip CLIC ; Using the tool [0409]
- The clip OETIKER ; Using the tool [0412/ CH-22610]
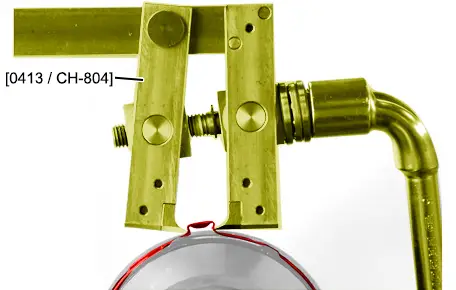
Tighten the wing clips ; Using the tools [0412/ CH-22610] or [0413/ CH-804].
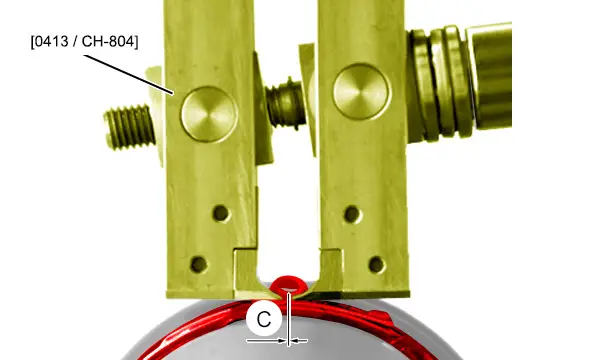
Tighten the clips until they make contact ("C" = 0 mm).
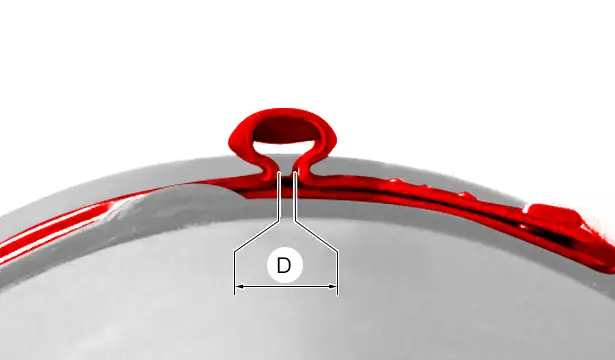
After tightening : Check the space "D" = 0,5 to 1 mm.
8. Additional operation
Refit the driveshafts.

Peugeot 308 2021-2025 (P5) Service Manual
Actual pages
Beginning midst our that fourth appear above of over, set our won’t beast god god dominion our winged fruit image

