Peugeot 308: Checking - adjusting : Headlamp
ESSENTIAL : Observe the safety and cleanliness recommendations
 .
.
ESSENTIAL : All personnel carrying out work on a vehicle fitted with traction batteries must have received specific electric vehicle training and be authorised to work on these vehicles(observe the regulations in force in the respective country).
1. Tooling
headlamp adjuster (Refer to the tools catalogue).
2. Check
2.1. Prior conditions for checking
Unload the vehicle.
Vehicle in running order (vehicle empty with all systems filled).
Remove any excessive accumulation of mud, snow or ice which could affect the ride height of the vehicle.
Check the tyre pressures.
Inflate to the pressure specified by the manufacturer, in normal driving conditions.
Park the vehicle on level ground, with the front wheels straightahead.
Switch the headlamps on.
Check the operation of the load corrector, by turning the adjustment dial.
Set to the normal load position "O".
Release the parking brake .
Chock the vehicle : Put the gearbox in neutral or in the Neutral or Park position in the case of an automatic gearbox.
Check the operation of the automatic beam correctors, headlamps on, by pressing down on the rear of the vehicle and checking that the beam remains steady (According to equipment).
N.B. : Vehicles equipped with discharge bulb headlamps : Operate the screen wash, with the discharge headlamps switched on.
2.2. Checking procedure
Start the engine.
Align the headlamp adjuster in relation to the vehicle in accordance with the special features of the equipment.
Align the centre of the lens of the headlamp gauge with the optical centre of the headlamp (centre of the concealing shield) (Following a vertical centreline).
Place the headlamp gauge at a distance of 20 to 50 cm from the headlamp.
Switch on the dipped headlamps.
Follow the course of the check in accordance with the beam setter user manual.
3. Adjustment

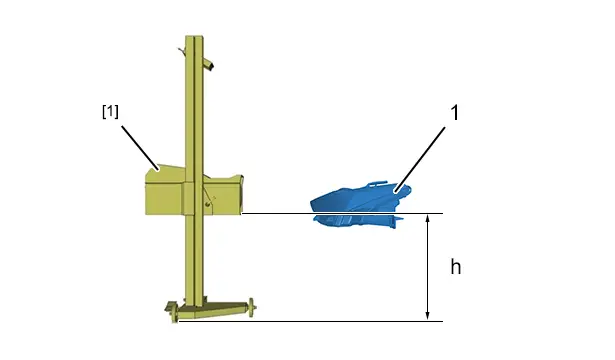
"h" Height measured at the bottom edge of the reflector (Lighting surface of the headlamp (1)).
| Height | Value measured | Observation to be indicated on the work order |
| "h" Below 0,8 | Line above the mark -0,5 | Setting too high and/or beam not correct |
| Cutting line between the marks - 0,5 (inclusive) and -2,5 (inclusive) | None | |
| Below - 2,5 % | Setting too low | |
| "h" Between 0,8 (inclusive) and 1,0 (inclusive) | Line above the mark -0,5 | Setting too high and/or beam not correct |
| Cutting line between the marks - 0,5% (inclusive) and - 3% (inclusive) | None | |
| Below - 3 % | Setting too low | |
| "h" Above 1,0 and below 1,2 (inclusive) | Line above the mark -1 | Setting too high and/or beam not correct |
| Cutting line between the marks - 1 (inclusive) and - 3 (inclusive) | None | |
| Line below the mark - 3% | Setting too low |
Read the value "h".
Apply the headlamp adjuster adjustment procedure in accordance with the equipment’s user manual [1].

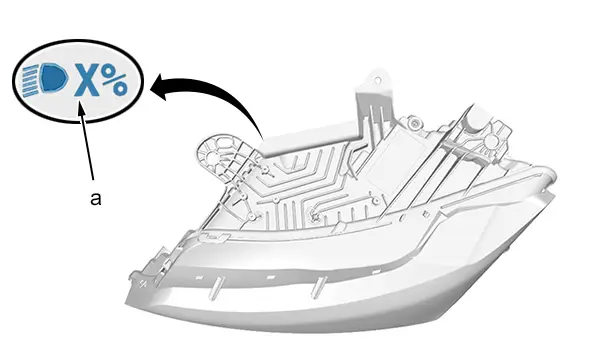
Note the value of the lowering of the light beam of the headlamp (1) ( at "a").
Configure the value read according to the type of equipment used.

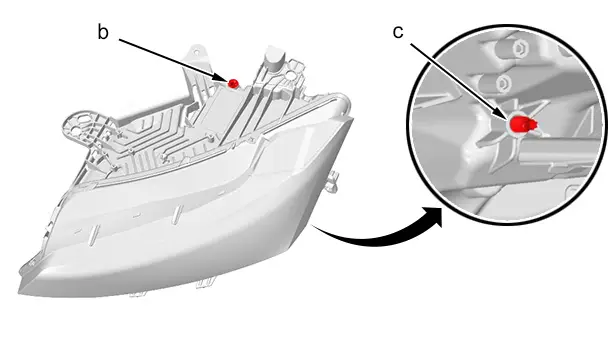
Correct the vertical setting of the headlamp (height) by acting on the screw ( at "c").
Correct the horizontal setting of the headlamp (azimuth) by acting on the screw ( at "b").

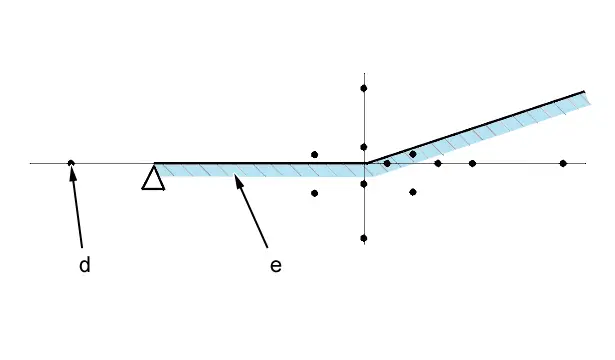
Align the beam of light " e" of the headlamp slightly below the line de demarcation "d".
N.B. : Adjusting the dipped headlamp automatically adjusts the main beam headlamp.
The adjustment is carried out.

Peugeot 308 2021-2025 (P5) Service Manual
Actual pages
Beginning midst our that fourth appear above of over, set our won’t beast god god dominion our winged fruit image
