Peugeot 308: Repair : Seat trim (Fabric )
ESSENTIAL : Observe the safety and cleanliness recommendations
 .
.
CAUTION : Follow the user instructions in the seat trim repair kit.
1. Tooling
Seat trim repair kit.
2. Preparation of the zone to be repaired
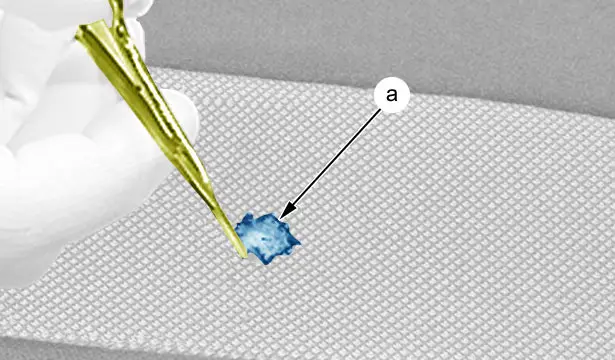
Cut the edges of the hole to be repaired cleanly (at "a") ; Using a pair of scissors.
N.B. : If the hole "a" is deep, fill it with foam.
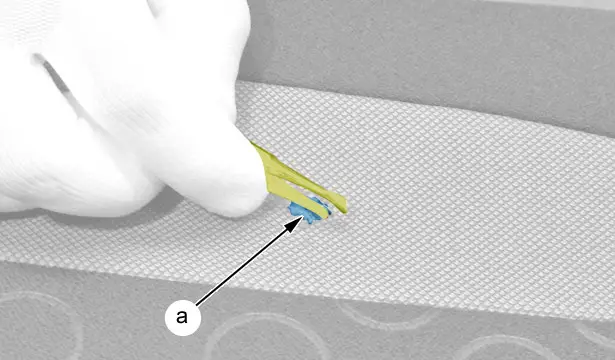
Separate the fabric from the foam (Approx. 10 mm around the hole "a" ) ; Using pliers (Tweezers ).
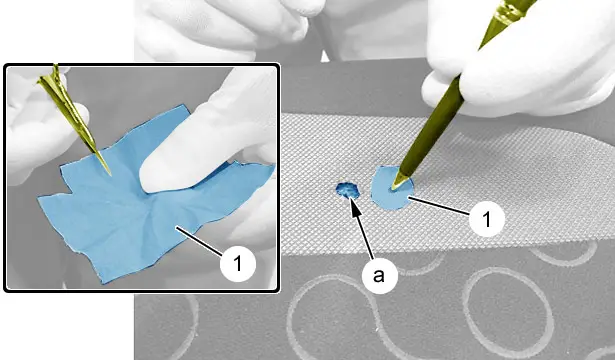
Cut a piece out of the backing fabric (1), somewhat bigger than the hole "a" to be repaired.
Make a mark in the centre of the piece of backing fabric (1).
CAUTION : The mark must be at the centre of the hole to enable you to position the fabric centrally.
Put the piece of backing fabric (1) in place.
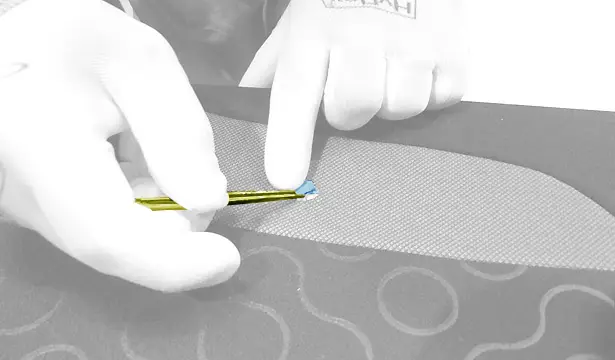
Apply the backing fabric with the tweezers and hold it in position.

With the spatula, take some powder adhesive.
Apply the adhesive on the edges only.
N.B. : Prepare the smoothing iron to the temperature indicated by the supplier ; See instructions for use.
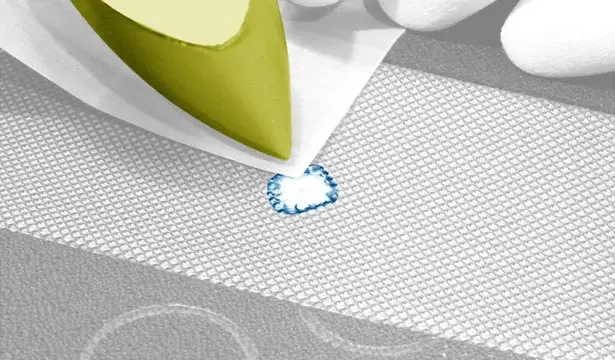
Remove the teflon and then use the smoothing iron to stick down the edges around the hole, taking the time indicated by the supplier.
CAUTION : Quickly inspect the repair after the initial heating to make sure that the adhesive is not drying around the hole.
3. Finding the colour
Find the colour that most approximates to the colour of the seat (Following the supplier’s instructions ).
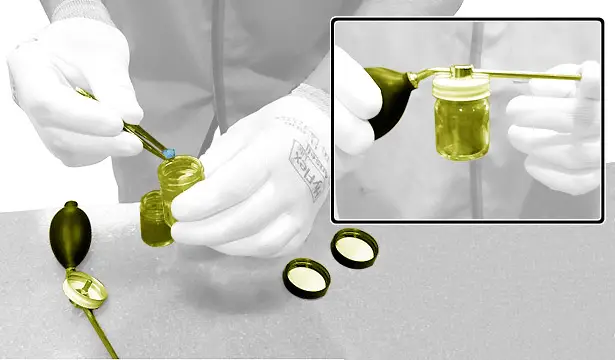
Take the fibre from the pot corresponding to the material being repaired.
Place the fibre (or a mixture) in the fibre sprayer.
4. Applying the repair fibre
Apply the repair fibre : See instructions for use.
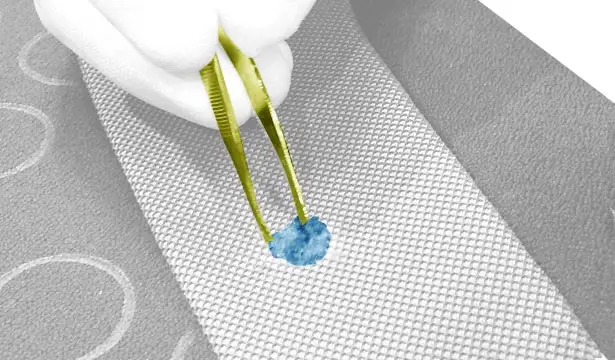
Place a small quantity of powder adhesive in the hole.
Overlay the fibre uniformly, using the tweezers.
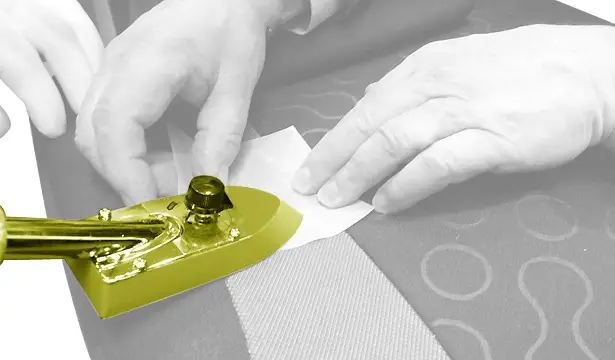
Heat with the iron at index 2.5, protecting the hole with the sheet of teflon, for the duration indicated by the supplier ; See user instructions.
Cut out a template the same size as the hole.
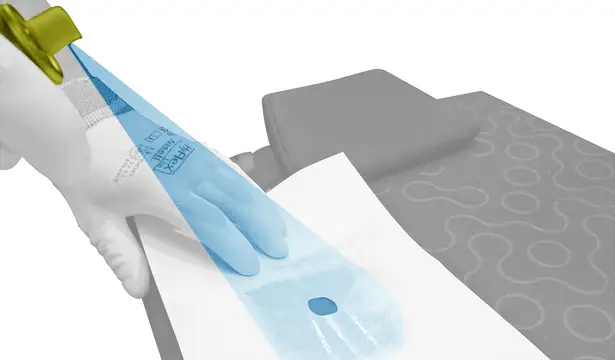
Spray the surface adhesive from the aerosol in short bursts.
5. trim level
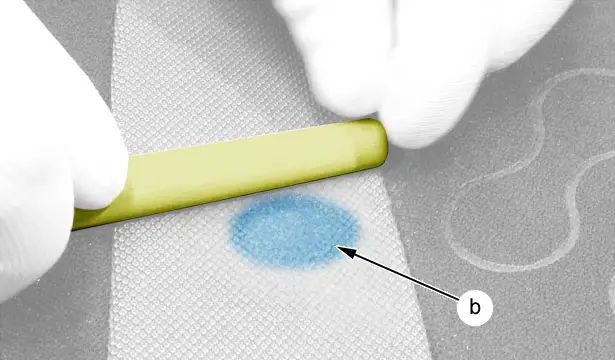
Apply the finishing fibre with the sprayer (at "b") : See instructions for use.
Smooth out the area using the brush.
N.B. : You can reproduce the texture or the design by moistening the lead of a pencil (except for velours material).

Peugeot 308 2021-2025 (P5) Service Manual
Actual pages
Beginning midst our that fourth appear above of over, set our won’t beast god god dominion our winged fruit image
