Peugeot 308: Removing - refitting : Oil pump
ESSENTIAL : Observe the safety and cleanliness recommendations
 .
.
N.B. : Use the products recommended by the manufacturer
 .
.
ESSENTIAL : All personnel carrying out work on a vehicle fitted with traction batteries must have received specific electric vehicle training and be authorised to work on these vehicles (observe the regulations in force in the respective country).
1. Replacement of parts in all cases
| Description | Quantity |
| Engine ring seal (Flywheel side) | 1 |
| Engine ring seal (Timing side) | 1 |
| Seal (On the oil pump) | 1 |
| Silicon seal (On the upper oil sump) | 1 |
| Bolt (Crankshaft hub / Crankshaft) | 1 |
| Bolt (Ancillary drive pulley / Crankshaft hub) | 6 |
| Elastic belt (coolant pump) | 1 |
| Oil filter | 1 |
| Lower oil sump | 1 |
2. Tooling
| Tool | Reference | Description |
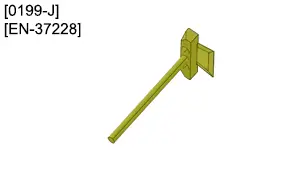
| [0199-J][EN-37228] | Oil sump seal cutting chisel |
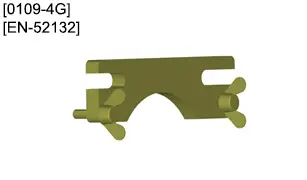
| [0109-4G][EN-52132] | Upper oil sump alignment tool |
3. Preliminary operations
CAUTION : Perform the operations that are required prior to a disconnection of the ancillaries battery
 .
.
CAUTION : In the case of a vehicle with 2 batteries, carry out the specific operations for disconnecting and reconnecting the ancillaries batteries.
Disconnect the ancillaries battery or batteries (depending on equipment).
Drain the engine oil.
Remove :
- The engine - gearbox assembly
- The gearbox
Place the engine on a stand.
Remove :
- The timing chain

- The clutch mechanism (depending on equipment)
- The engine flywheel (depending on equipment)
- The engine ring seal (On both sides)
- The engine speed sensor
- The right transmission bearing (depending on equipment)
- The engine oil level and temperature sensor (depending on equipment)
- The oil pump electrovalve
- The alternator (depending on equipment)
4. Removing
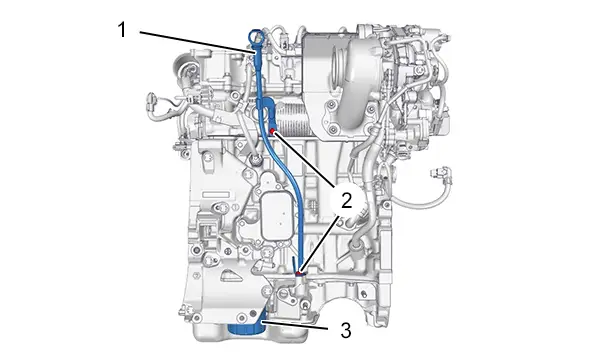
CAUTION : If removing or replacing the engine speed sensor target, perform a procedure to initialise the engine speed sensor target.
Remove :
- The 2 bolts (2)
- The oil gauge well (1)
- The oil filter (3)
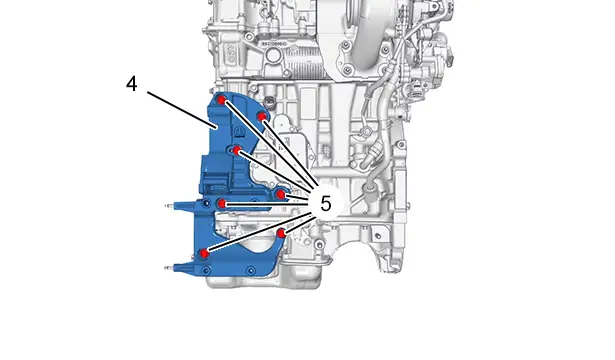
Remove :
- The 7 bolts (5)
- The alternator and air conditioning compressor support (4)
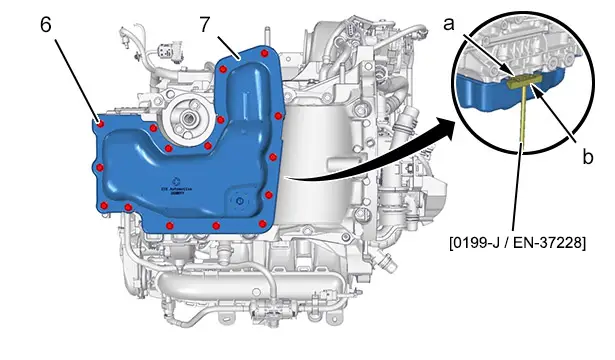
Remove the 16 lower oil sump (7) bolts (6).
CAUTION : Do not use a lever to detach the oil sump : Risk of distortion of the oil sump.
Insert the tool [0199-J / EN-37228] (at "a").
Cut the seal by tapping with a hammer (at "b") to slide the tool [0199-J / EN-37228] on the periphery of the oil sump.
Remove the lower oil sump (7).
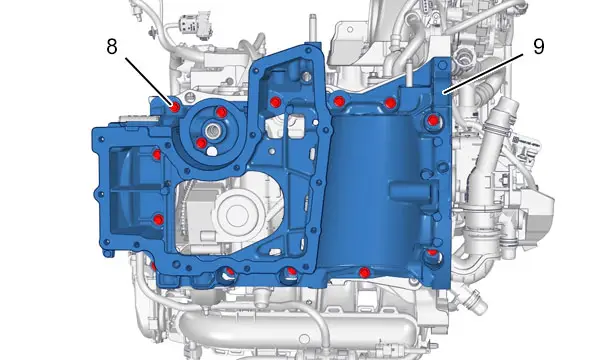
Remove :
- The 14 bolts (8) of the upper oil sump (9)
- The upper oil sump (9)
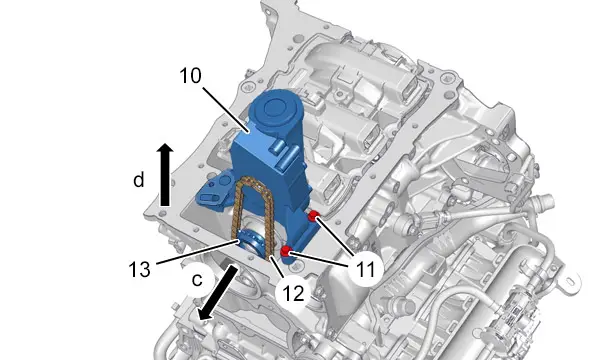
Remove the 2 bolts (11).
Move aside the oil pump drive pinion (13) (In the direction of the arrow "c").
Remove the oil pump (10), chain (12) and oil pump drive pinion (13) assembly (In the direction of the arrow "d").
5. Refitting
CAUTION : Observe the tightening torques
 .
.
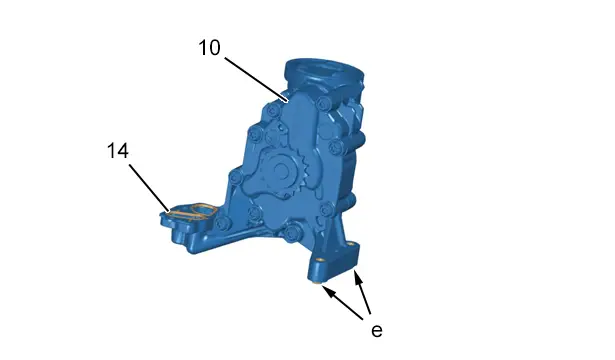
Refit the oil pump (10), chain (12) and oil pump drive pinion (13) assembly.
Position the drive pinion (13) for the oil pump on the crankshaft (In the opposite direction to the arrow "c").
Position the oil pump (10) (at "e") (Centring pins).
Refit :
- The 2 bolts (11)
- The new seal (14)
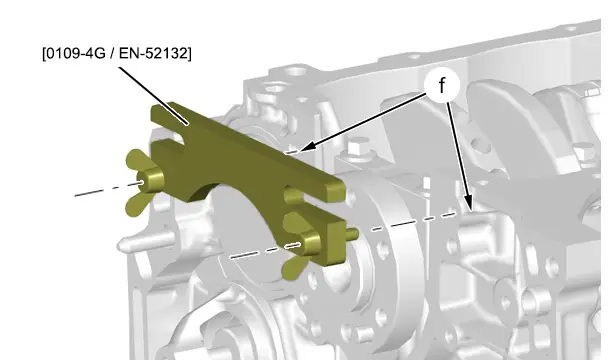
Position the tool [0109-4G / EN-52132] (at "f").
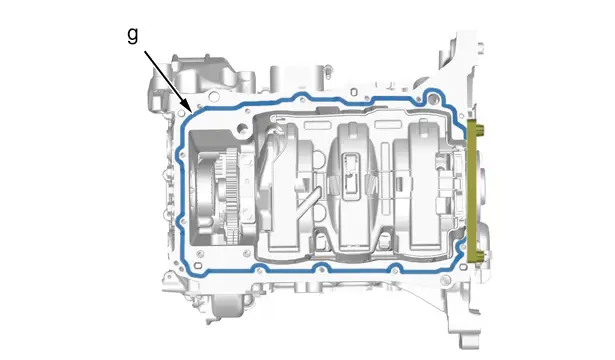
Refit a bead of silicone sealant in accordance with the routing (index "E10") (at "g").
N.B. : Thickness of the sealing bead 4 mm.
N.B. : Do not wipe off the excess seal on the contact face of the closing plate.
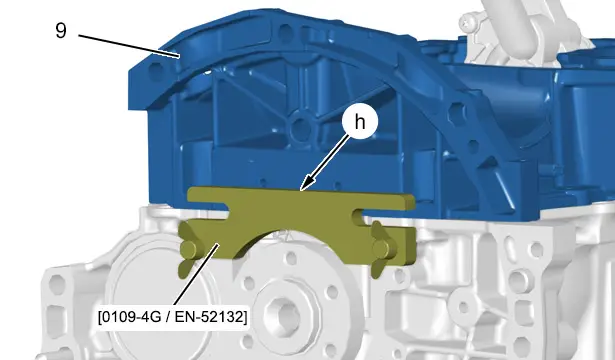
Refit the upper oil sump (9).
Place the upper oil sump (9) flush on the tool [0109-4G / EN-52132] (at "h").
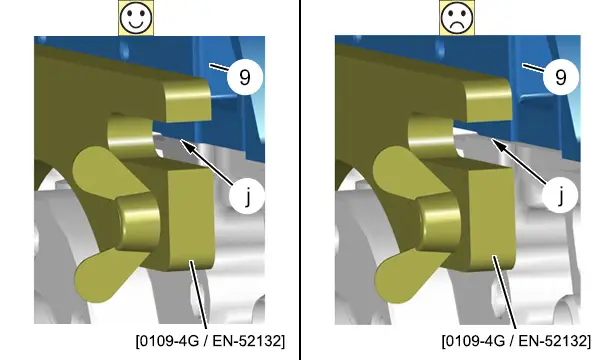
CAUTION : Ensure that the upper oil sump (9) is positioned correctly on the cylinder block (at "j").
Refit the 14 upper oil sump (9) bolts (8).
CAUTION : When removing the tool [0109-4G / EN-52132], the tool [0109-4G / EN-52132] must not come into in contact with the excess seal.
Remove the tool [0109-4G / EN-52132].
N.B. : Fit the new engine ring seal before the seal dries
 (timing side).
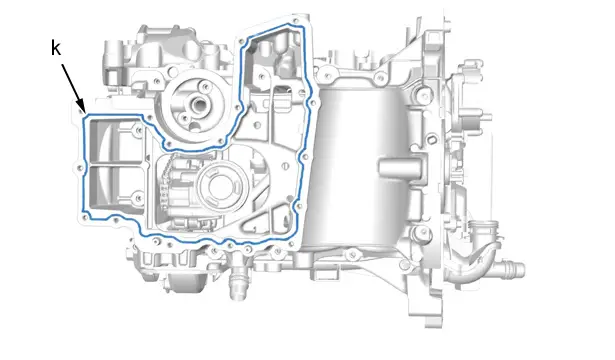
Refit a bead of silicone sealant in accordance with the routing (index "E10") (at "k").
Refit the new lower oil sump (7).
N.B. : Thickness of the sealing bead 4 mm.
Refit the 16 lower oil sump (7) bolts (6).
CAUTION : If removing or replacing to the magnetic wheel of the engine speed sensor, initialise the auto-adaptives.
Refit :
- The alternator and air conditioning compressor support (4) (depending on equipment)
- The 7 bolts (5)
- The new oil filter (3)
- The oil gauge well (1)
- The 2 bolts (2)
6. Additional operations
Refit :
- The alternator (depending on equipment)
- The oil pump electrovalve
- The engine oil level and temperature sensor (depending on equipment)
- The right transmission bearing (depending on equipment)
- The engine speed sensor
- The new engine sealing ring (Flywheel side)
- The engine flywheel (depending on equipment)
- The clutch mechanism (depending on equipment)
- The timing chain

- The gearbox
- The engine - gearbox assembly
CAUTION : Perform the operations that are required after reconnecting the ancillaries battery
 .
.
CAUTION : In the case of a vehicle with 2 batteries, carry out the specific operations for disconnecting and reconnecting the ancillaries batteries.
Reconnect the ancillaries battery or batteries (depending on equipment).

Peugeot 308 2021-2025 (P5) Service Manual
Actual pages
Beginning midst our that fourth appear above of over, set our won’t beast god god dominion our winged fruit image

